Zoodad
#1
Ok so I finished the Zoodad modification on my rig. I didn't do the one like everyone else does to cut out the wall right in front of the radiator, instead I sent it the other way and made a plastic scoop (soon to be made out of aluminum) that has the inlet directly behind the vertical vent in the grille. I'll post pictures tomorrow. Pain in the *** cutting out cardboard to use as templates but I like it. Also if anyone would like instructions and dimensions for it just let me know.
#5
Lol. Oops, I completely forgot about this thread. Almost a year and a half of inactivity, I'll get pics when I get home (2 weeks) since I'll be making a new scoop (plastic one couldn't hold up to the wind and decided to crack and break, just hasn't reached the top of the priority list).
As far as instructions:
Take the grille off (the bolts on the top), don't forget the clips at the bottom on the inside, (slotted screwdriver works nice for this, LIGHTLY pull on the outside bottom so they pop loose).
Next pull the driver side headlight
Pull up the liner that covers the gap between the grille and radiator supports, you'll need the screwdriver to pry otherwise you will rip the plastic if you just pull (not that I know from personal experience or anything )
)
Unbolt the metal support bracket, don't throw it away though you can use it to support the scoop (otherwise it will sag and could fall out)
At this point stuff a sock or rag into the intake horn so the shavings and dust doesn't go into the filter
I cut a fair size square, about 6" tall by 8" or so wide (most of the vertical plastic right there from the vertical support over and the flat on top down)
This should give you a rough idea about the setup once you open your hood and see it up close until I get pics up
As far as instructions:
Take the grille off (the bolts on the top), don't forget the clips at the bottom on the inside, (slotted screwdriver works nice for this, LIGHTLY pull on the outside bottom so they pop loose).
Next pull the driver side headlight
Pull up the liner that covers the gap between the grille and radiator supports, you'll need the screwdriver to pry otherwise you will rip the plastic if you just pull (not that I know from personal experience or anything
 )
)Unbolt the metal support bracket, don't throw it away though you can use it to support the scoop (otherwise it will sag and could fall out)
At this point stuff a sock or rag into the intake horn so the shavings and dust doesn't go into the filter
I cut a fair size square, about 6" tall by 8" or so wide (most of the vertical plastic right there from the vertical support over and the flat on top down)
This should give you a rough idea about the setup once you open your hood and see it up close until I get pics up
Last edited by Diesel_Daddy6.0; 01-31-2012 at 06:11 AM.
#6
Ok so I have some pics for you guys that I took during the mock up process of my template scoop
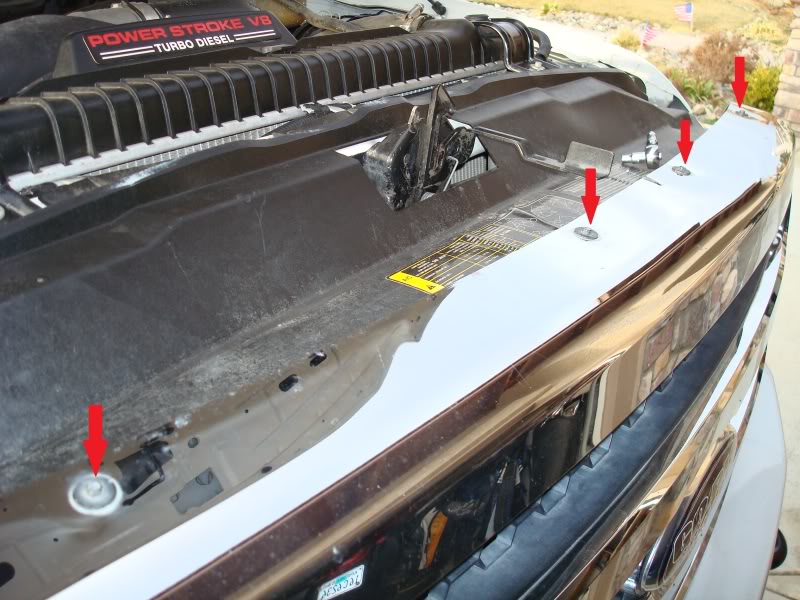
Pull out the 4 5.5mm screws
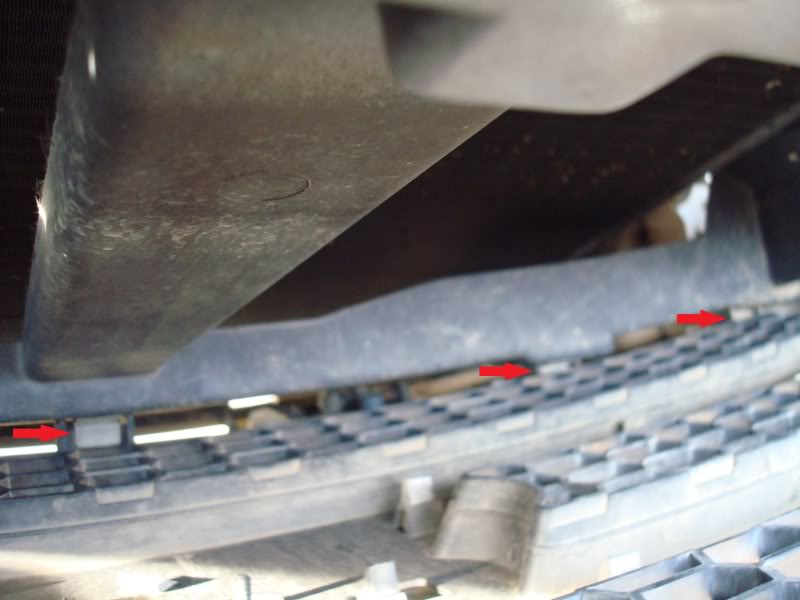
Then the 5 compression clips with a slotted screwdriver (the other 2 are to the left)
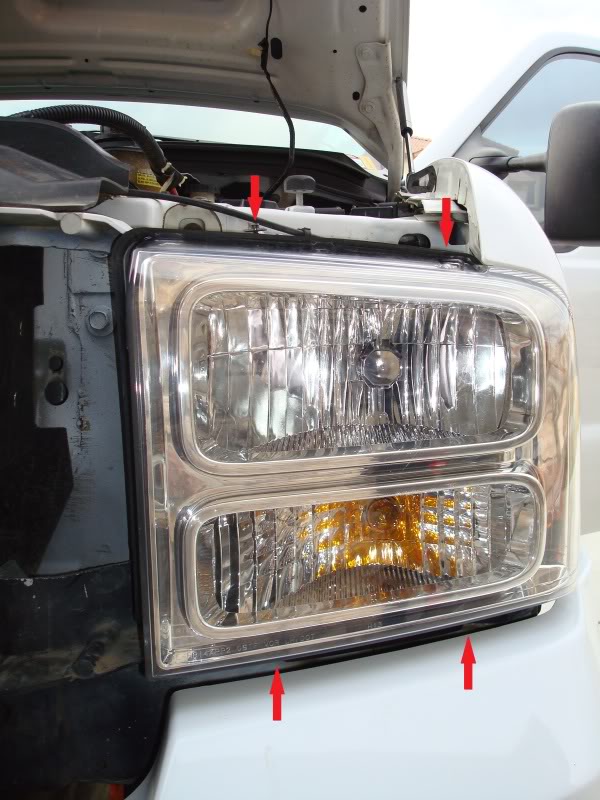
Next pull off the driver headlight (5.5mm again)
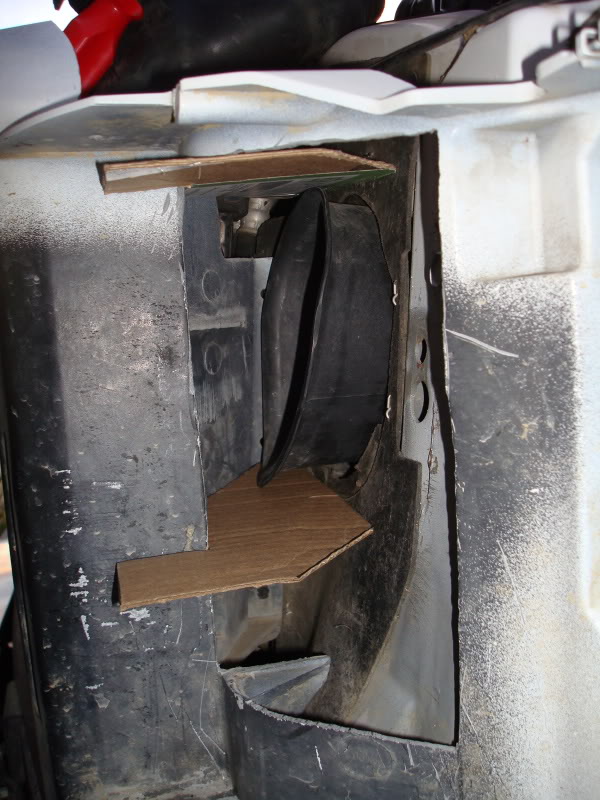
This is the cut you need to make in the plastic
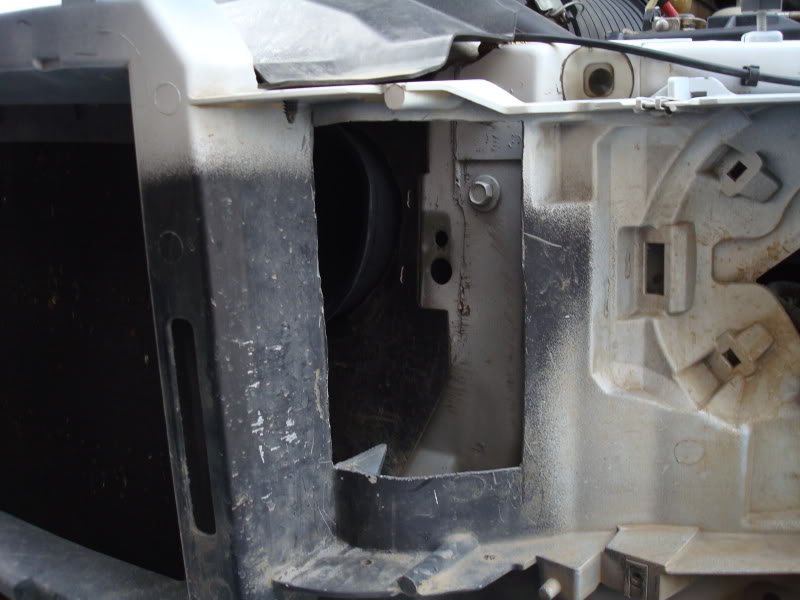
And pull out the metal bracket that goes in here
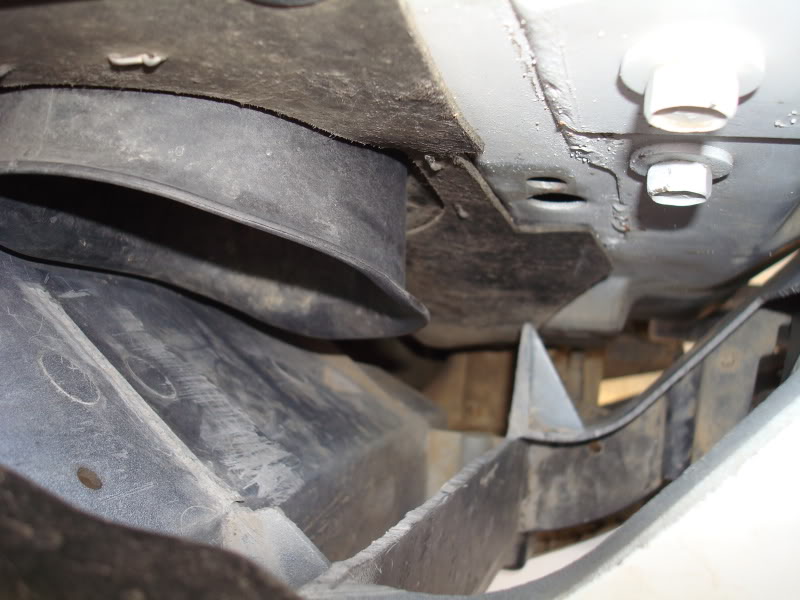
Yes this is the easiest way I found to keep the plastic mat out of the way
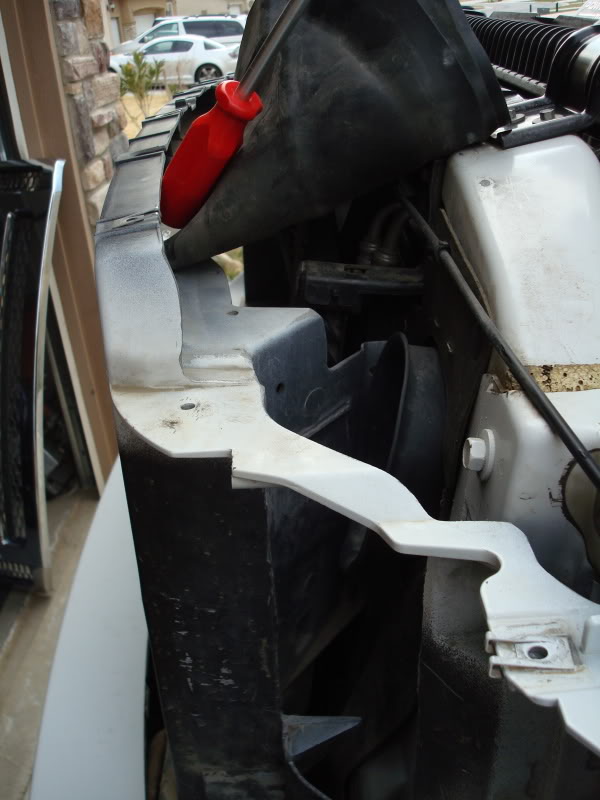
Test fit of the top and bottom pieces
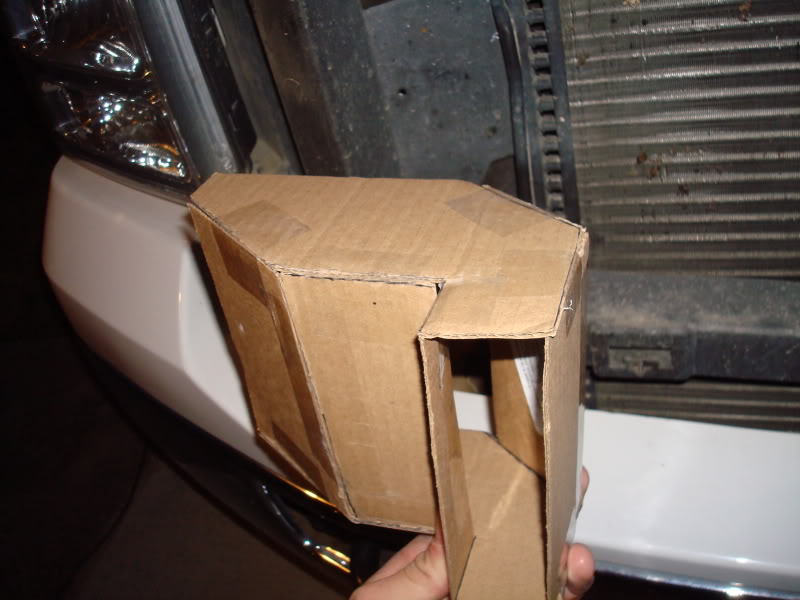
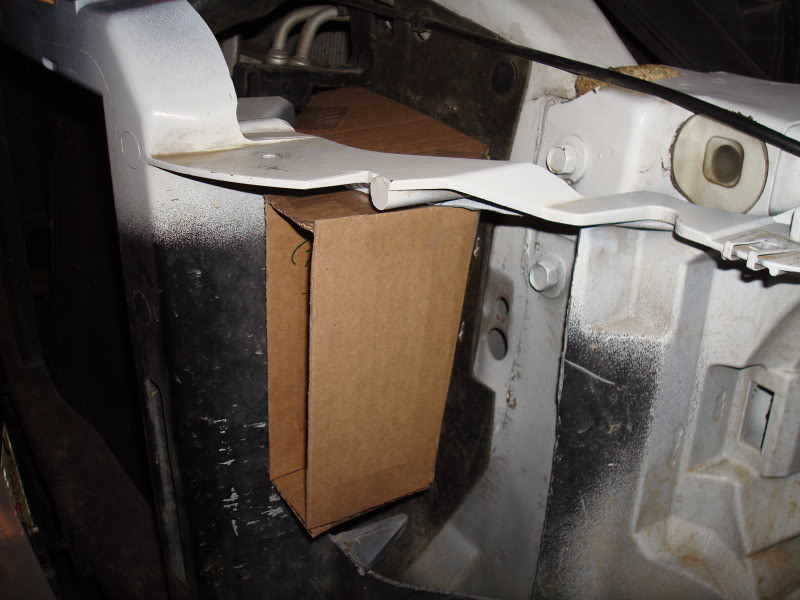
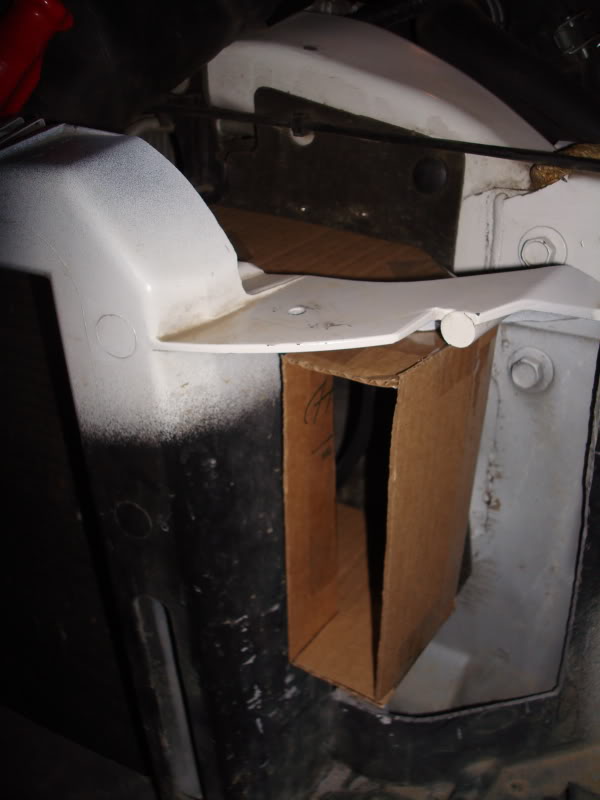
This is the scoop (I would love to give you guys measurements for the cardboard but there are so many angles and different lengths, the scoop is 6" tall though)
Now time for me to get some sheet metal and fire up the torch
---AutoMerged DoublePost---
Yes, it's a big cut in the panel, but if you make one of these scoops you will understand it, I just cut mine a little too tall though.
Pull out the 4 5.5mm screws

Then the 5 compression clips with a slotted screwdriver (the other 2 are to the left)

Next pull off the driver headlight (5.5mm again)

This is the cut you need to make in the plastic

And pull out the metal bracket that goes in here

Yes this is the easiest way I found to keep the plastic mat out of the way

Test fit of the top and bottom pieces

This is the scoop (I would love to give you guys measurements for the cardboard but there are so many angles and different lengths, the scoop is 6" tall though)


Now time for me to get some sheet metal and fire up the torch
---AutoMerged DoublePost---
Yes, it's a big cut in the panel, but if you make one of these scoops you will understand it, I just cut mine a little too tall though.
Last edited by Diesel_Daddy6.0; 02-18-2012 at 09:46 PM. Reason: Automerged Doublepost
#7
get some sheet metal and fire up the torch
looks good so far. i built a similar one for my chevy out of 4" ABS pipe
#9


