03-05 fuel can mod instructions
#1
Ok here are some instructions on the fuel can mod for the 03-05 Dodge truck when installing an Airdog or FASS fuel system and 1/2" lines.
Step 1. REMOVE YOUR FUEL CAN
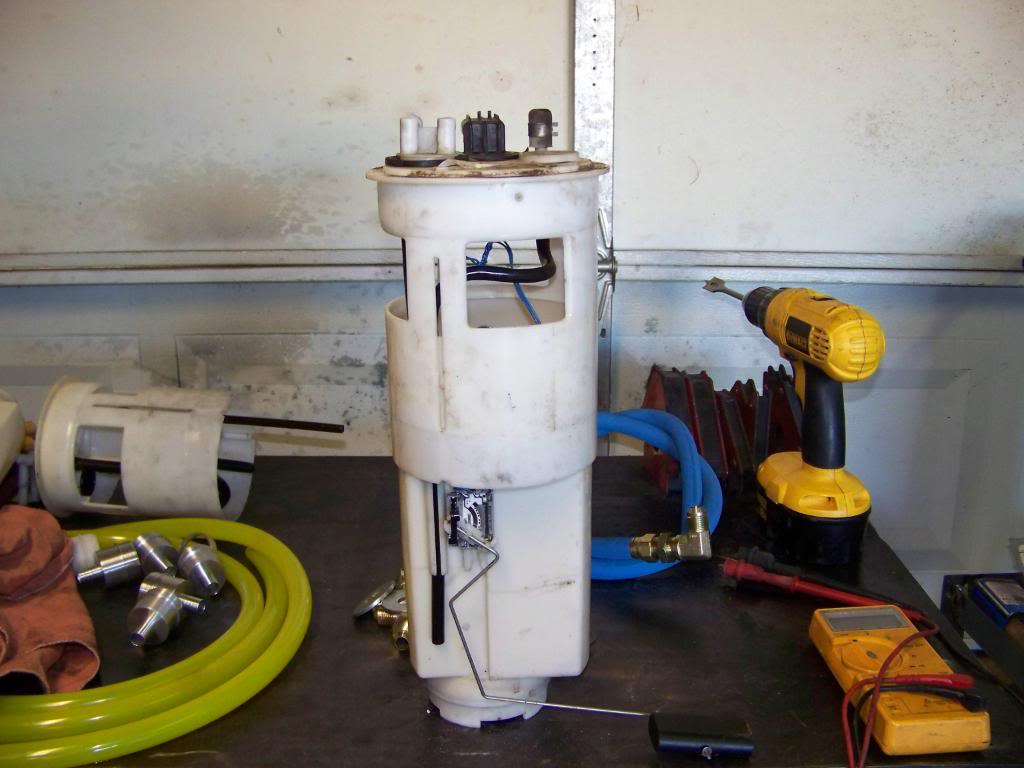
Step 2. Mark your fuel can by scribing it so when you reassemble, it goes back together in the correct clock position.
Step 3. Take a pair of needle nose pliers and reach into the can, grab a hold of the black tubing that goes to the bottom and pull up. This dislodges the stock pick up tube and will also allow you to separate the can in half. NOTE: 1 of the tubes is just a vent (black rubber cap on the top of the can) pull on the other one!
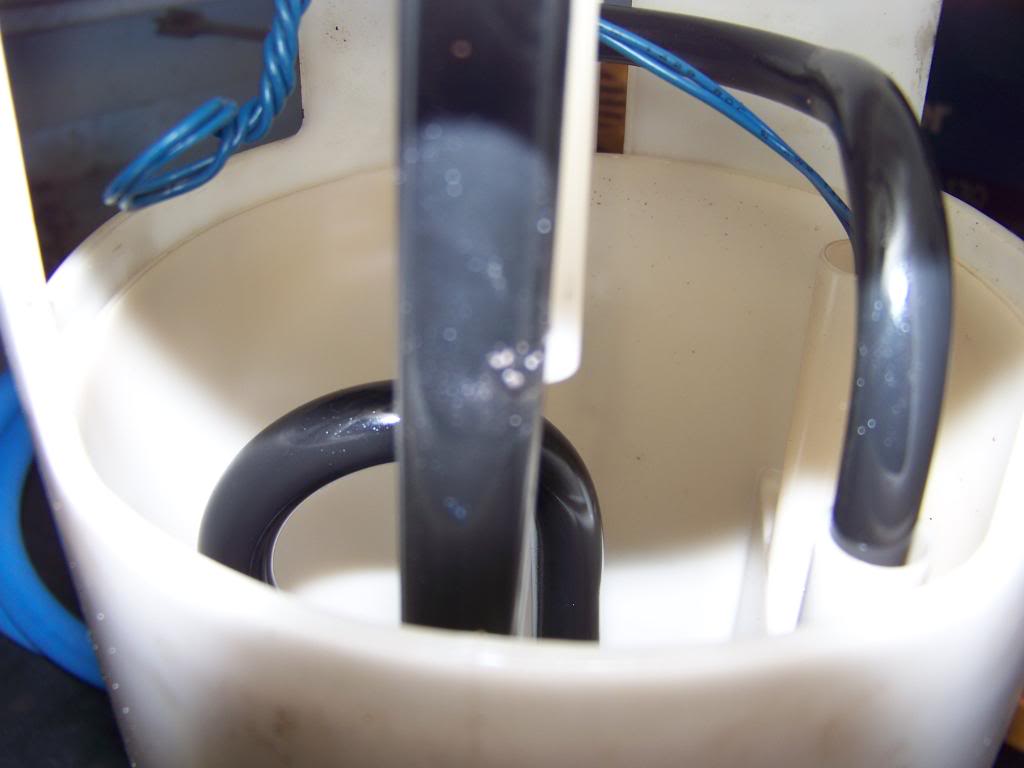
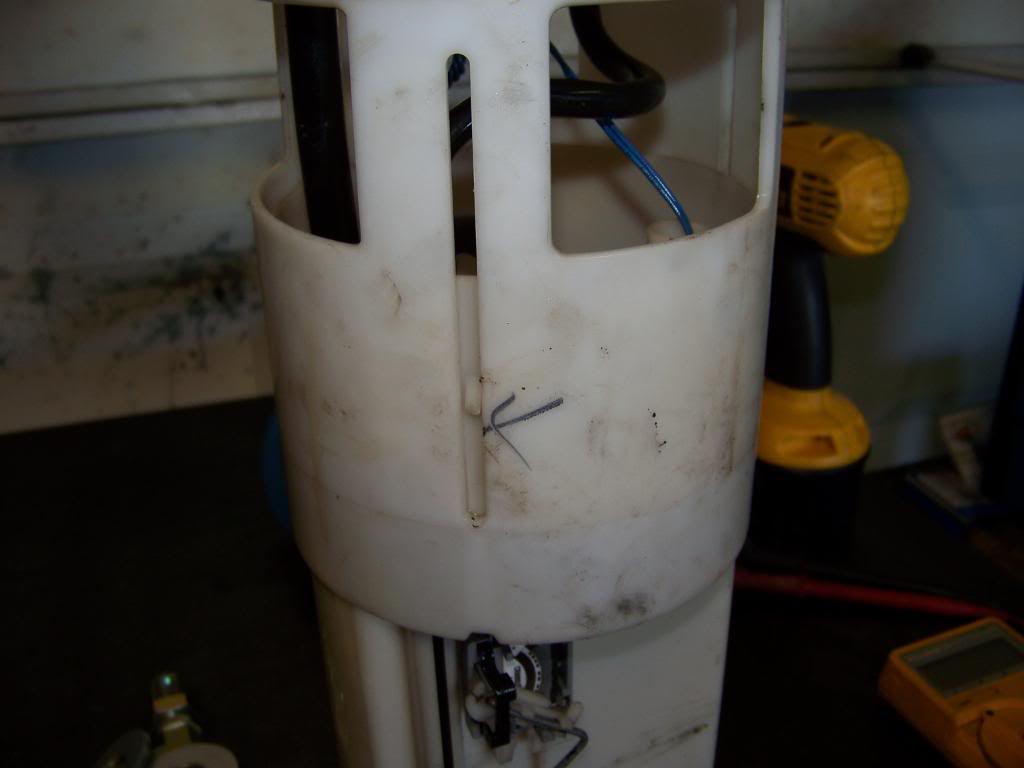
Step 4. Reach inside the can and unplug the sending unit before splitting in half. Don't want to do any wiring damage! There are 3 lock tabs on the canister (black arrow in pic). These are a pain in the rear but once done, the can splits in half.
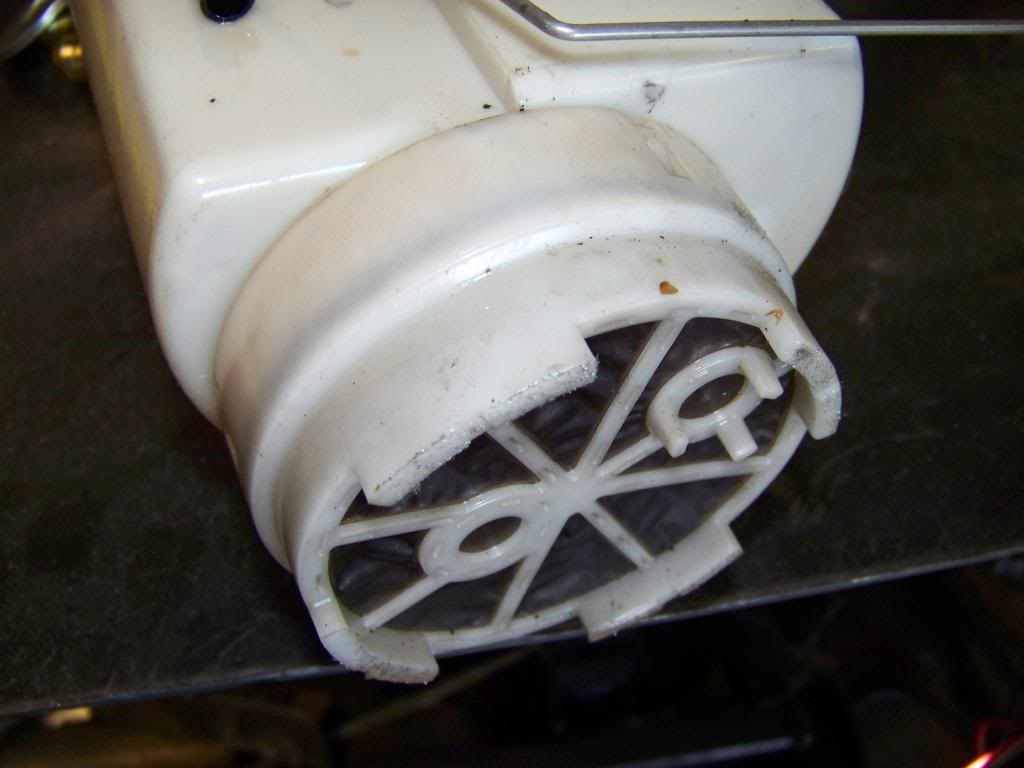
Step 5. There is a pre-filter on the bottom of the can. There are also 3 lock tabs to remove. Remove this pre filter now.
---AutoMerged DoublePost---
step 6. Since I have done a couple of these, I cut the black tubing. Here is a shot inside the fuel can (under side of the top)
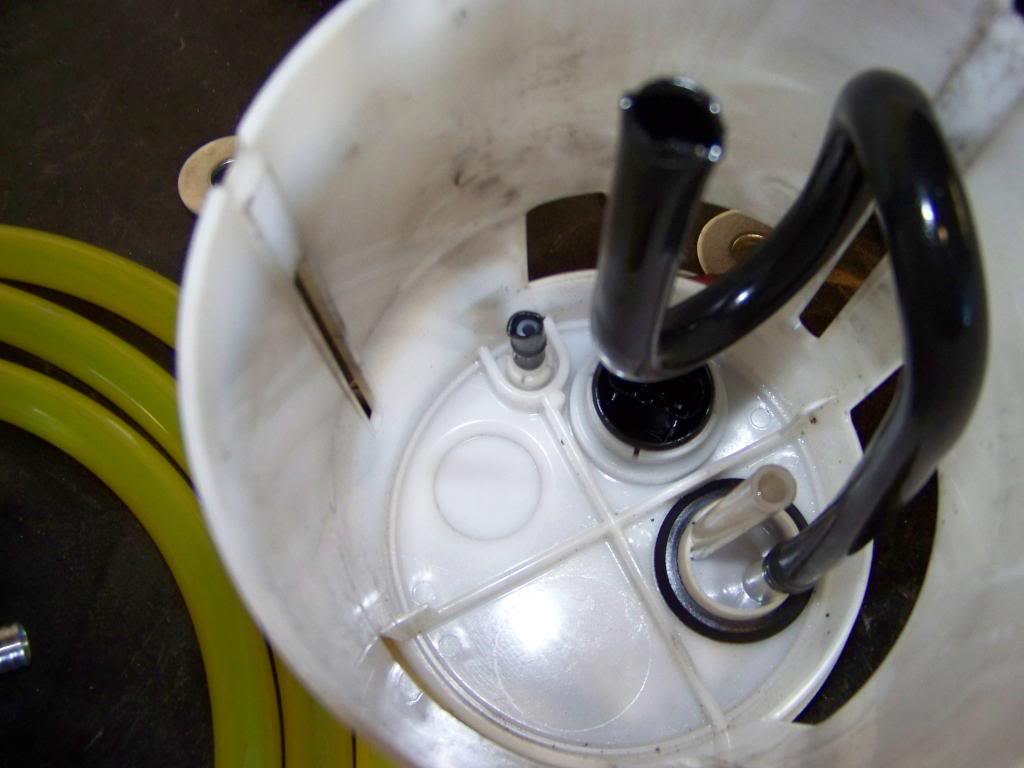
step 7. remove all the black tubing that came on the can stock. Turn the can upside down and you will see 2 holes (1 has a nipple). The one with the nipple, you will drill thru to 3/4" to enlarge the pick up surface area.

after drilling

step 8. Attach the billet pick up to your hose

step 9. don't forget to re-install the lock ring removed from the stock pickup. this locks the aluminum pick up in place
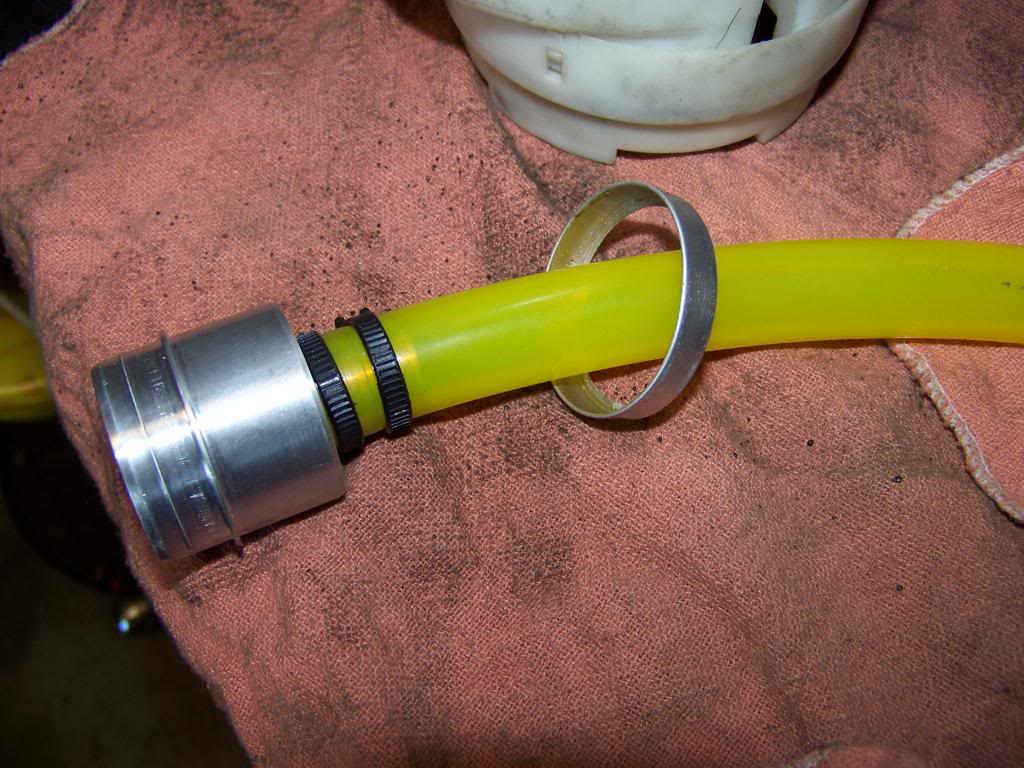
step 10. reach inside the lower section of the can and install the pick up into the stock location. re-install lock ring
step 11. Now for the top half. Drill 2 3/4" holes to insert your bulkhead fittings (must buy them from a local source or I can provide additionally)

Step 1. REMOVE YOUR FUEL CAN


Step 2. Mark your fuel can by scribing it so when you reassemble, it goes back together in the correct clock position.
Step 3. Take a pair of needle nose pliers and reach into the can, grab a hold of the black tubing that goes to the bottom and pull up. This dislodges the stock pick up tube and will also allow you to separate the can in half. NOTE: 1 of the tubes is just a vent (black rubber cap on the top of the can) pull on the other one!


Step 4. Reach inside the can and unplug the sending unit before splitting in half. Don't want to do any wiring damage! There are 3 lock tabs on the canister (black arrow in pic). These are a pain in the rear but once done, the can splits in half.

Step 5. There is a pre-filter on the bottom of the can. There are also 3 lock tabs to remove. Remove this pre filter now.

---AutoMerged DoublePost---
step 6. Since I have done a couple of these, I cut the black tubing. Here is a shot inside the fuel can (under side of the top)

step 7. remove all the black tubing that came on the can stock. Turn the can upside down and you will see 2 holes (1 has a nipple). The one with the nipple, you will drill thru to 3/4" to enlarge the pick up surface area.

after drilling

step 8. Attach the billet pick up to your hose

step 9. don't forget to re-install the lock ring removed from the stock pickup. this locks the aluminum pick up in place

step 10. reach inside the lower section of the can and install the pick up into the stock location. re-install lock ring
step 11. Now for the top half. Drill 2 3/4" holes to insert your bulkhead fittings (must buy them from a local source or I can provide additionally)

Last edited by cbrahs; 02-24-2009 at 07:03 PM. Reason: Automerged Doublepost
The following 2 users liked this post by cbrahs:
Boosted Cowboy (12-17-2010),
ETXBlueRam (02-24-2009)
#3
step 12. Slide the 1/2" line onto the barbed fitting and test the can out by sliding it down and look for binding of the new hose. once no binding is confirmed, secure with a cable tie to ensure it does not come off the barbed fitting
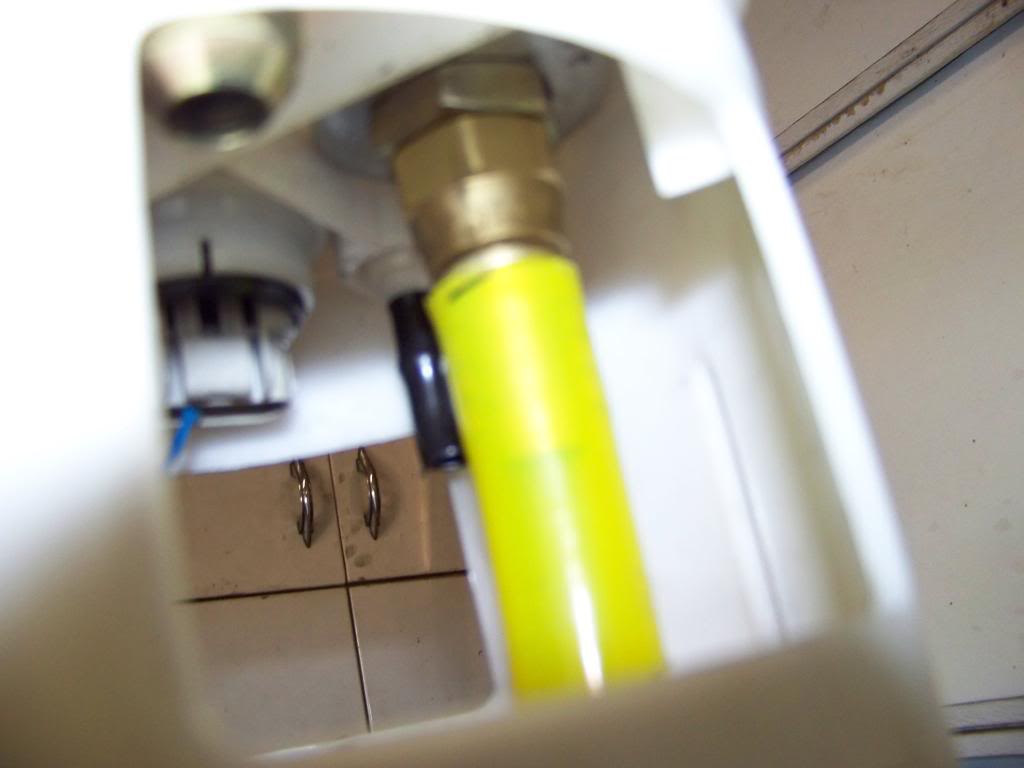
step 13. Reassemble the fuel canister. Make sure you line up your marks before you snap it into place!
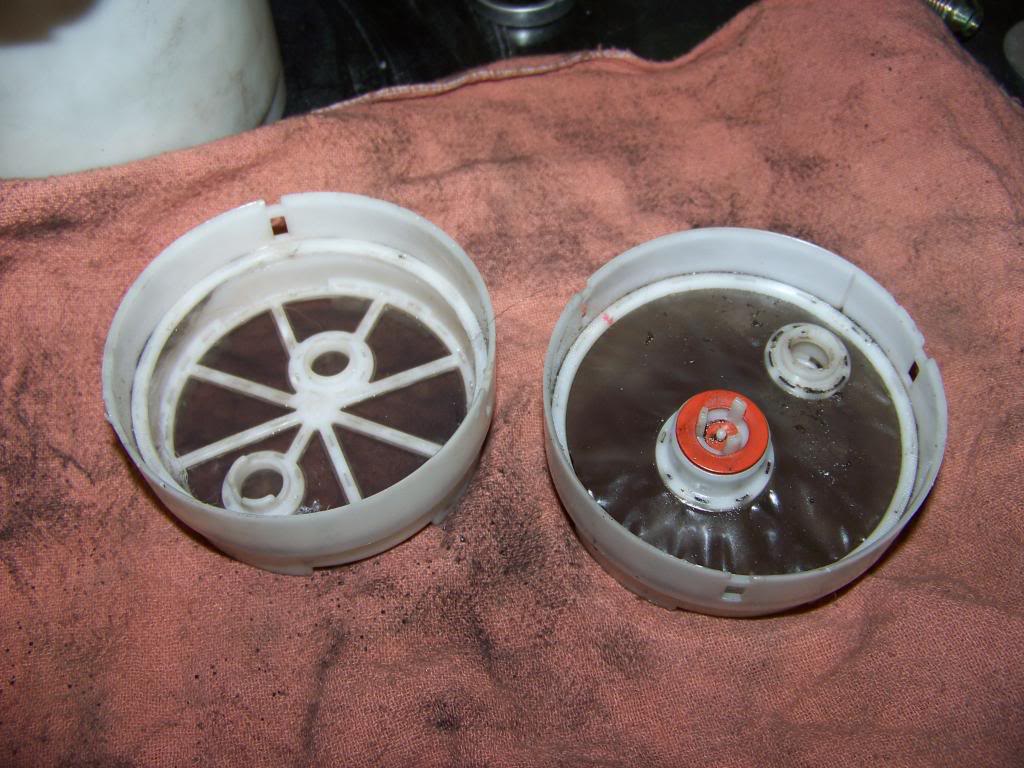
step 14. The prefilter has 2 layers of filtration. I removed the top half (it has 2 small valves see the prefilter on the right). after you remove that section reinstall onto the canister.
Now you are ready to install the can back into your truck!
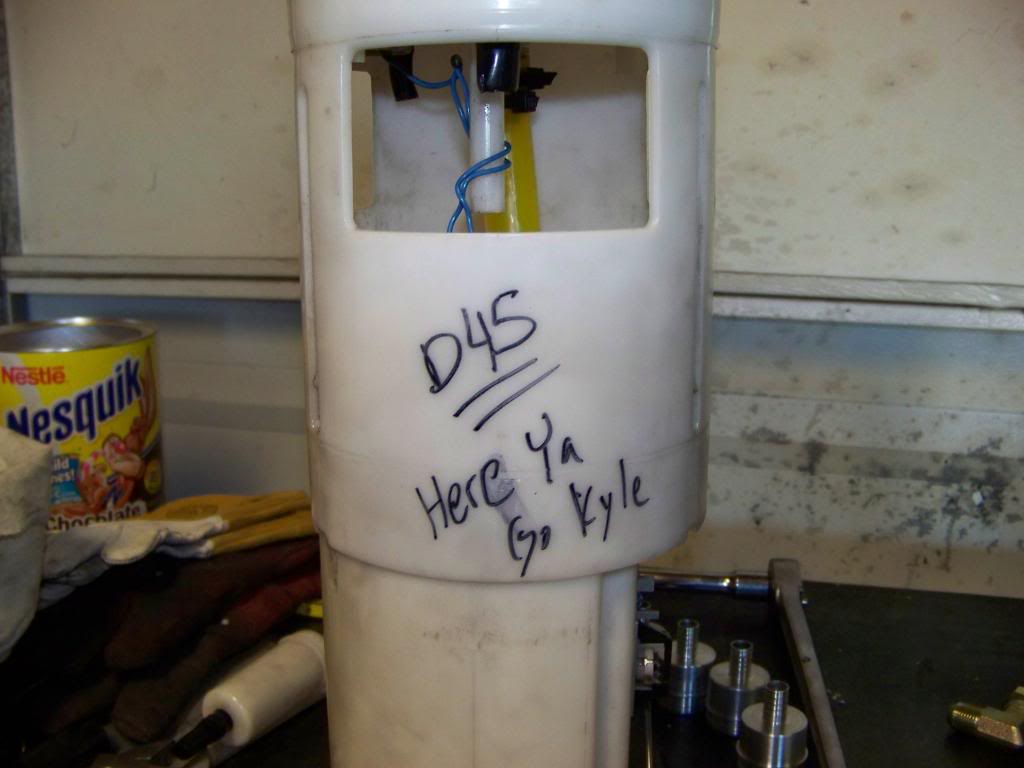
---AutoMerged DoublePost---
These pickups are going to be $45 shipped. We will release them soon. We are currently testing in 2 trucks. One of which is a bad *** with twins and a crap load of mods.

step 13. Reassemble the fuel canister. Make sure you line up your marks before you snap it into place!
step 14. The prefilter has 2 layers of filtration. I removed the top half (it has 2 small valves see the prefilter on the right). after you remove that section reinstall onto the canister.

Now you are ready to install the can back into your truck!

---AutoMerged DoublePost---
These pickups are going to be $45 shipped. We will release them soon. We are currently testing in 2 trucks. One of which is a bad *** with twins and a crap load of mods.
Last edited by cbrahs; 02-24-2009 at 07:17 PM. Reason: Automerged Doublepost
#4
Well having OCD when it comes to this stuff aint all that bad. After some bench testing, It was not pulling the fuel down as far as I would like so we went back to the drawing board, made some minor changes and after testing it is DONE!
in step 14. you will have to remove the top layer of screen.
in step 7. you will have to drill the nipple off to enlarge the hole to 3/4" and a uni bit does great! This will allow the new pick up to reach farther than the stock one did!
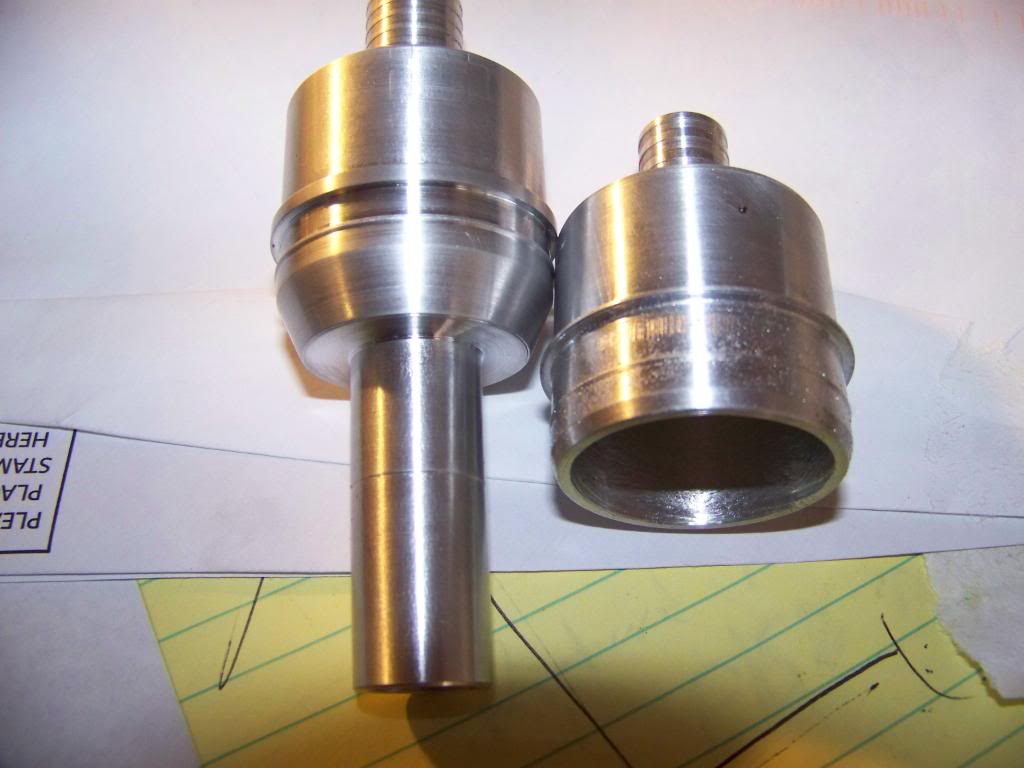
Here are a couple pics of the updated version. New one on the left.
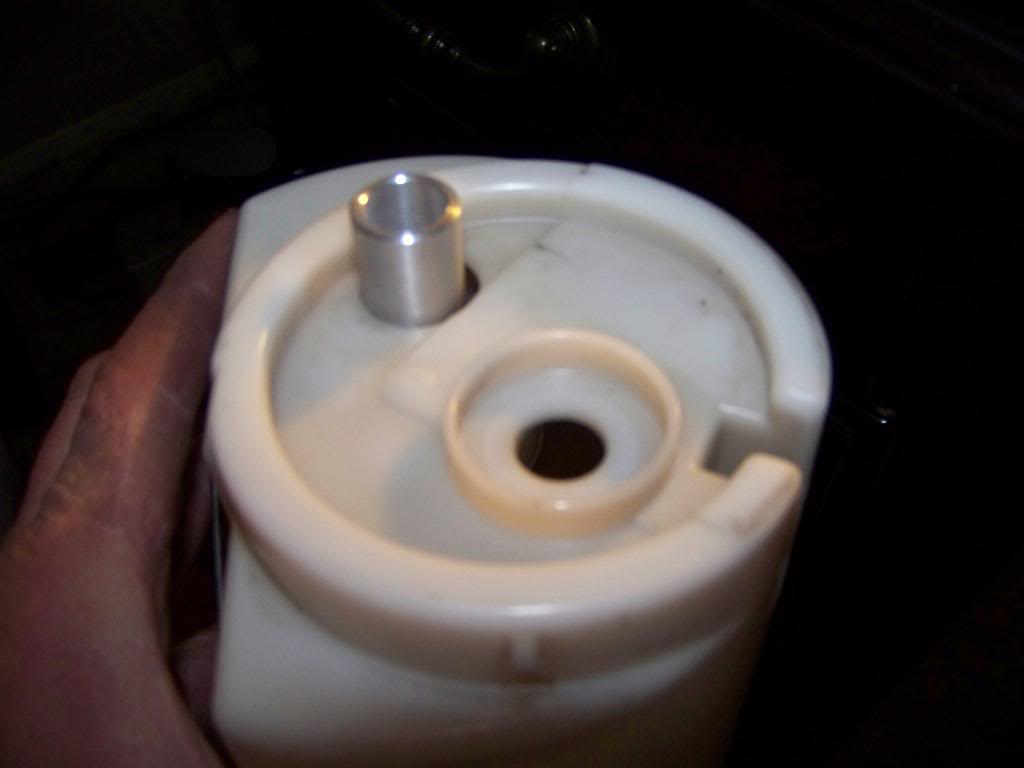
here is a pic of the unit protruding past the bottom. This will allow it to get damn near to the bottom of the tank and retain a pre filter!
It was tough to get a good shot but this pic you can see the pick up reaching deep into the bottom near the pre filter
With the changes, the price unfortunately had to be increased to $55 shipped. If you are wanting the hose alone with the kit, it is $65 shipped.
in step 14. you will have to remove the top layer of screen.
in step 7. you will have to drill the nipple off to enlarge the hole to 3/4" and a uni bit does great! This will allow the new pick up to reach farther than the stock one did!
Here are a couple pics of the updated version. New one on the left.

here is a pic of the unit protruding past the bottom. This will allow it to get damn near to the bottom of the tank and retain a pre filter!

It was tough to get a good shot but this pic you can see the pick up reaching deep into the bottom near the pre filter

With the changes, the price unfortunately had to be increased to $55 shipped. If you are wanting the hose alone with the kit, it is $65 shipped.
#7
Chris, So this is the basket outa an 03 truck? Just tryin to figure out what I'm goin to do if this is one outa and 03 since the directions show a totally different style basket with the new style pickup AirDog has......
#8
all of the 3rd gen pre-in tank pump canisters look like the one airdog is showing due to the lift pump being installed at the bottom of the can. For those who have had the retro performed, you will need the pick up for 06 adn newer.
Thread
Thread Starter
Forum
Replies
Last Post
Jet A Fuel
Tech Article Submission
0
06-05-2015 03:28 PM


